Gyaru Make Up Tutorial - Step By Step Pictures
August 29, 2011I haven't made any make up tutorial on my blog for quite a while, so I thought I'd be sharing my simple gyaru make up tutorial here, with step by step pictures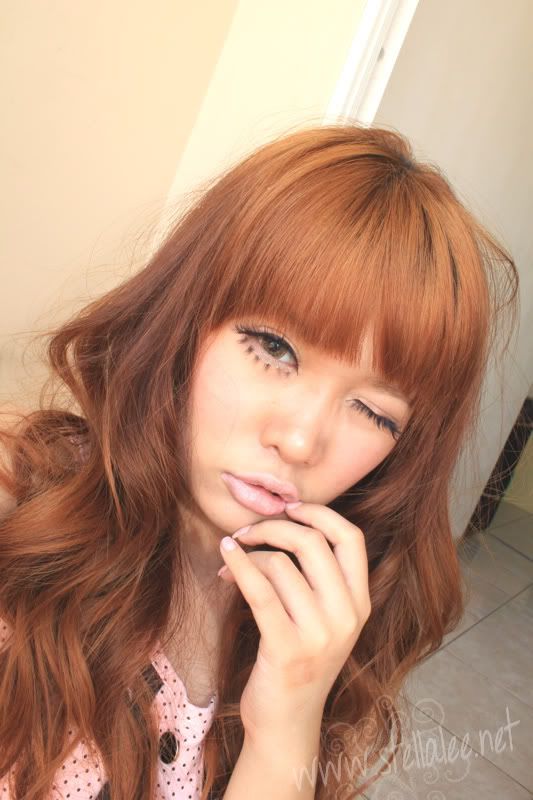
Gyaru comes from word "Gal" in english but pronounced as Gyaru by Japanese. Its basically all fashionable and stylish girls in Japan. Japanese gyaru is widely known for their tan skin, heavy make up, fashionable clothes, and bleached hair. Make up is one of the key for achieving gyaru look. So please read more if you're interested in my transformation :D
And I know I look so different with and without make up, thanks for admitting my make up skill. After all, I have guts to show you my bare face and unphotoshopped pictures too =D
Products that I used for achieving this look =
  stop looking at Naruto stickers, its my brother's LOL;

1. Start with clean face. Make sure you have washed your face properly so it's ready to be dolled up
2. I apply Make Up Forever HD Elixir to moisten my face, especially my cheek because it's really dry. You may use your moisturizer. Dont forget to use sunblock if you're going out on day
3. Apply primer. Always use make up base or primer to make your make up last longer. I use Monistat Chafing Relief Gel Primer and rub it on my finger tips
4. Put the primer on my face into 5 sections, forehead, left-right cheek, nose, and chin. Then spread it evenly. By using primer the foundation will look smoother and more flawless. Gyaru has flawless face because we care about appearance a lot. So make sure your face is flawless too!

5. You can use foundation brush, stippling brush, finger, or anything, but I like to use sponge because it gives more flawless finish. I prepare 2 sponges, and you will know what they are for soon. Wet the sponge with water beforehand, and apply your foundation from the center of your face outward
6. I use Lancome Teint Miracle Foundation in BO-02, pump it on the back of my hand and take it with my sponge
7. Pat the foundation all over my face evenly, can always layer the foundation if you want more coverage

8. Time to contour face! You can't say no. Contouring is one of the biggest point in gyaru make up because by contouring you will have more defined & tanner face. I use PAC Creamy Foundation in #10. Contouring with foundation gives more natural effect, and this is when you use your second sponge for
9. Contour your face according to your face shape. I have square face so this is how I contour my cheek. Dont forget to contour your nose wing. Its a must must must on gyaru make up to achieve high-nose look
10. Using Laura Mercier Undercover concealer in UC2 and the lightest shade to highlight the face
11. I hightlight my nose bridge, cheekbones, forehead, and chin. You can hardly see it I'm afraid because of the lighting. Just find any light foundation or concealer will do

12. Blend it until you cant see the harsh edges. I blend the highlighter with my first sponge, and blend the shading with my second sponge
13. Powder to set up. I use NARS Loose Powder in Flesh. Pat it gently, dont rub

14. Time to re-define your brow. Using Anna Sui Eyebrow Mascara in 600 to give orange-yellow color to my black eyebrow to match my hair color [I have no time to bleach it]
15. Draw the eyebrow and make sure its thinner but sharper on the end. I use Calvin Klein Eyebrow Pencil in Dark Blonde
16. Brush it with your eyebrow brush to make it more natural

17. Gyaru has big eyes and double eyelids, its a must. You can use eyelid tape, eyelid glue, or eyelid fibre. Unfortunately I only have eyelid tape with me so please bear with it
18. Use circle lenses to give bigger and dolly eyes. I use Vivian 3-Tone in Brown sponsored by GalLover. It's diameter is 17mm. Dont use 14mm because almost every gyarus wear more than 15mm circle lens
19. Prime your eyes with eyeshadow primer. I use Urban Decay Primer Potion. It will make the eyeshadow last longer and the color will be more vibrant, apply some on your lower eye too because we will put some eyeshadow there. Blend it gently

20. Apply any medium brown eyeshadow. I use Benefit Creaseless Cream Eyeshadow in RSVP. Apply it all over my eyelid
21 & 22 . Open & Close Eyes, with Benefit Creaseless Cream Eyeshadow in RSVP only

23. Take any dark brown eyeshadow and place it on my outer V. The dark brown eyeshadow I'm using is just a random eyeshadow from NYX Smokey Eyes Box S114. You can use any dark brown eyeshadow that you have
24. Blend the eyeshadow so there will be no harsh edges between the first eyeshadow
25. Much better right, but there's still some harsh line on outer corner

26. Take any matte light eyeshadow. I use random light matte eyeshadow from my NYX Palette, and then place it on the browbone and use what's left on the brush to blend the harsh edges on your outer corner
27. Say good bye to harsh edges
28. Use the dark brown eyeshadow that we use before, and place it on lower lashline halfway

29. Line your eyes, and wing it a little. I also decide to draw a thin line on my inner corner to change my eye shape. I use Dolly Wink Liquid Eyeliner because its really easy to use , especially when drawing thin line
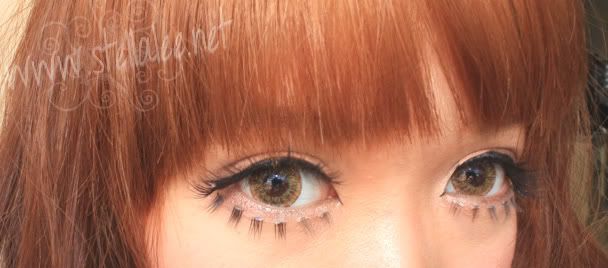
30. Time for your false eyelashes. Glue the band with your eyelash glue. I use Dolly Wink False Eyelashes in 02 Sweet Girly for my fake eyelashes, and using Duo Eyelash Adhesive for gluing. Eyelashes is a must in gyaru look! you cant skip this step!
31. Place it as close to your lashline as possible, and secure it in place with Q-tip if you want
32. Curl your lashes so the fake lashes and your real lashes will blend together.

33. Do the same to the other eye, once the glue dries, it will remain clear. Apply mascara afterwards
34. Use Dolly Wink False Eyelashes in 06 Baby Cute for my lower lashes, and place it a little far away from your real lashes to give bigger looking eyes. I use tweezer to put it for precise application, and attach the bottom lashes carefully

35. Use light matte pink blush on the apples of your cheek. Focus on the apples instead of bringing it outward. I use MAC Powder Blush in Pink Swoon
36. Apply your lip balm to get rid of dry lips. Gyaru's lips are so moist so chappy lips is a big no
37. Use any nude lipstick or in my case, Lip creme from NYX in Tokyo. I prefer nude pink for my look to give sweeter look
38. Curl your hair and style it accordingly
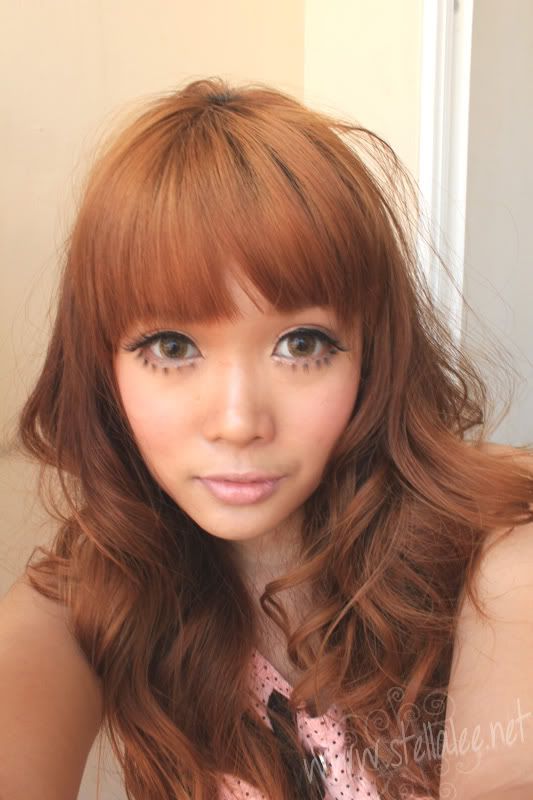
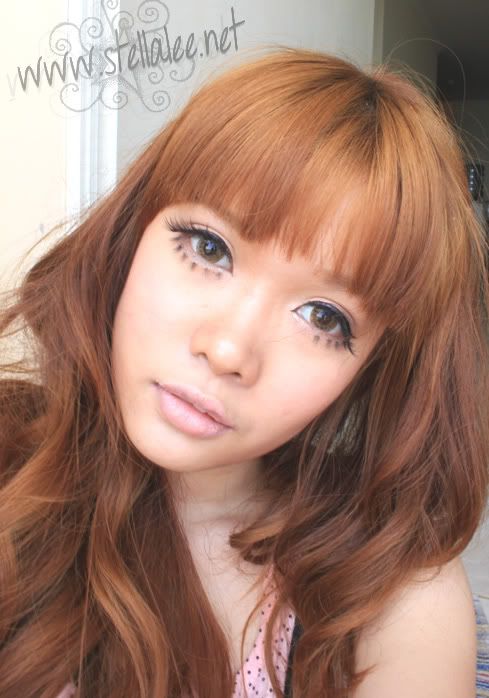
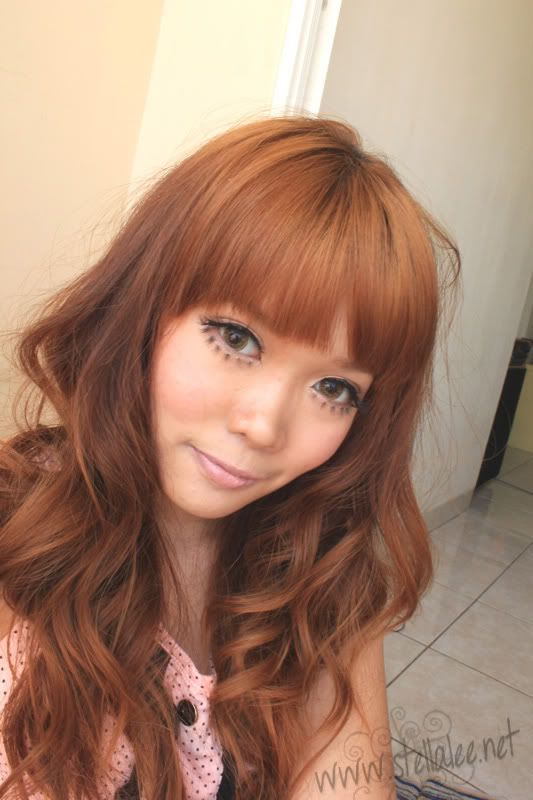
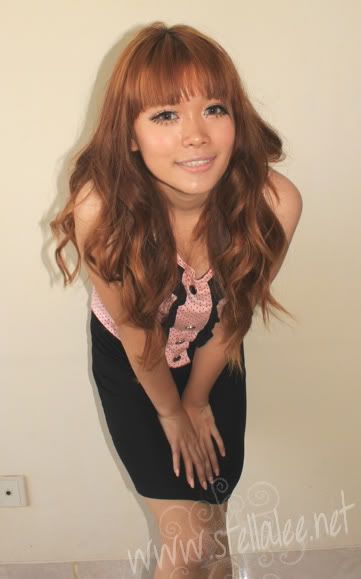
The rest of it, are only useless self-absorbed vain photos of mine
taken with my webcam, geez it looks much better with crap cameras! ==
so, do you enjoy this make up tutorial or find it helpful? In fact Gyaru make up is not that difficult to follow. The gyaru make up trend nowadays is nude make up, nude lips, deep eyelids, big upper and lower false eyelashes, pinkish cheek, and contoured face & nose
you may purchase the circle lenses that I use for this tutorial in GalLover, they ship worldwide with a lot of gyaru circle lenses types to choose from. I use Vivian 3 Tone in Brown and it gives feminine and cute effect on my eyes
Let me hear your comment or opinion below to improve my next tutorial!
--------
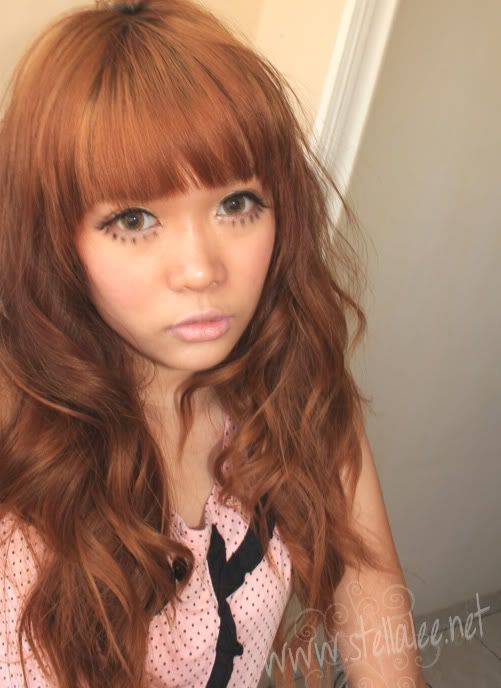
Anyway, a lot of people mention about my lower lashes, thanks a lot for the comments and suggestion on twitter, mail, and so on. It's not the natural gyaru make up for daily use. the look is supposed for fun. Probably next time I'd make the natural gyaru make up. The lower lashes are inspired by Tsubasa's dolly wink in baby cute so I put it quite apart from my real lashes. I wont use this kind of make up when I go out either lol
I will make another tutorial so please wait for it ^__^ <3
So, until next time gals
with love, Stella <3



55 comments
cakeppp....
ReplyDeletebtw, km mirip banget sama modelnya dolly wink,, esp yang di kemasan lower eyelash-nya.. :p
nice tuto :) walaupun rada malesin sih uda liat pic scroll lagi kebawah buat penjelasan scroll atas lagi xD *reader tukang komplen* but overall the tutorial not confusing :D love your deep-eyelid X3~ I still can't make it >_>
ReplyDeletebtw, first picture resembles someone nih :p
model dolly wink emang cuman satu say, namanya tsubasa masuwaka, dia model gyaru hehe :b makasih yaaa
ReplyDeleteoh okay, kalo gitu nanti penjelasannya langsung di attach barengan picturenya deh untuk next tutorial :) thanks a lot for the suggestion <3
ReplyDeletehave you tried eyelid glue or eyelid fibre? :)
really? emang mirip siapa? :-D
your welcome dear :) yep, currently use eyelid glue :) better than regular scotch walau masih susah diatur haha, mirip siapa lagi klo bukan tsu-chan~ XD bibirnya khas banget LoL
ReplyDeleteI'm gonna make a tutorial about how to use eyelid glue properly though, next time. its on my list :)
ReplyDeletetapi klo buat daily use, aku prefer scotch. klo eyelid glue kadang jg suka susah ngebaur esedonya :(
hahahha makasih, but i think every gyaru has that kind of nude lips. tsubasa is a part of gyaru, and she's the most noticeable one i believe :) her style is followed by many, and i love her too ^^
nice tutorial.. ~xD
ReplyDeletethanks dear :-*
ReplyDeleteMaksudku hair style n make up kamu dsini bikin mirip banget sama si tsubasa ini, tp paling mirip yang di kemasan lower eyelash itu.. :D
ReplyDeleteohhh.. haha sori yah suka agak lemot :rotfl: makasih sayy :-* padahal ini bukan tsubasa inspired XD
ReplyDeletegreat tutorial :yes: :yes:
ReplyDeletetottemo kawaii yo stella :kissed:
berharap bisa make up seperti itu.. pasti diriku ga keliatan ndut... *OMG*... i love it :)
ReplyDeleteayo ayo sini dimekapin ;D
ReplyDeletethanks a lot nisa :kissed: youre cuter XD
ReplyDeleteWOW...this is an awesome tutorial and I actually like this vs. a video because I could actually follow this step by step! I am definitely following because I need more make-up tips and looks! Thank you SO much for stopping by and I am glad you commented so that I could discover your fabulous blog!
ReplyDeletethanks a lot for your kind comment <3
ReplyDeletei update my blog regularly so you can read a lot of posts from my blog about beauty related ^_^ and thanks for following <3
is step by step pictures more easy to follow? ill make more of it instead of video then, thanks <3
cakep stell. you look like a doll. and I love the lower lashes. jadi tambah pengen cobain dolly wink.. hadeeehh...
ReplyDeletethanks a lottt :-* but it looks quite strange on real life XD its not what people in here commonly use ..
ReplyDeleteayo cobain dolly winkkkk =D
i havent reviewed them yet, tapi buatku agak gak worthed sii yang upper lashesnya XD
Hi Stella! You look great even without makeup and the gyaru look you did is super cute!! I love your tutorial! Honestly, it's probably the best blog picture tutorial I have seen (and I have seen many!). I really look forward to your future tutorials which I'm sure takes a lot of work.
ReplyDeleteBy the way, I love your hair -the bangs and the colour look fabulous on you ;)
upper lashes nya emag rd" g worth it stel..soalnya kurang dramatic..makanya gw lbh sering pake eyemazing...
ReplyDeleteyeah, im gonna review it later =D i prefer diamond lash for upper lashes. they make great and affordable lashes
ReplyDeletethanks a lot Karen for your compliment. I'm not a pro in make up field so I apologize if there's anything lack in this tut ^_^
ReplyDeletethank you :-* in fact my hair color in real life is lighter, idk why it turns out a little dark on the photos :( its damaged a lot as ive mentioned before :cry: i wanna go lighter though =D
wow, you look like the real deal :D
ReplyDeletekyknya bagusan klo per gbr ada penjelasannya deh, jd bc nya g bolak balik.
but it's really helpful :-D
ok! i will do it next time like what you said. thanks for the suggestion :yes:
ReplyDeleteI really like your hair! The blunt fringe looks so cute on you~
ReplyDeletethanks a lot dear :D i wanna have side swept bangs for mature look next time :)
ReplyDeleteYou look so cute! Love your hair a lot!
ReplyDeletethanks a lot! I love it too hehe :-*
ReplyDeletehello, i love your tutorial its so vivid, check out my blog if you like
ReplyDeletecheck out my blog i think you will like
ReplyDeletesure thing :-?
ReplyDeletehello there, you leave your id anonymous, i dont think i can check your blog ?:-)
ReplyDeleteThanks for the nice comment on my blog.
ReplyDeleteYour tutorial is awesome and you are so cute ^__^
Yours Mika
thanks a lot for your kind comment :D youre cuter! :-*
ReplyDeleteThank you banget Stella buat tutorialnya <3
ReplyDeletethanks for reading my blog too <3 :-* glad to help
ReplyDeleteI love this make up :) But sincerely.. How long does it take? Do you do it every morning? Do you always wear artificial eyelashes? I'm afraid I'm to lazy to do it every day ;D But i'm gonna follow some of your tips.
ReplyDeleteUsually it takes 1-2hours to do the make up, and 1 hour for hair style. Gyaru style is not as simple as everyday's make up. And I only wear this style when I'm going out with friends or on special occasion. I'd love to wear this style everyday, but people will stare [which in fact i can handle], the worst stuff is some people in my country will take it too hard and probably i would end up being robbed or kidnapped if i were using this style on daily basis lol seriously, but thats true..
ReplyDeleteIm taking public transportation to my campus, and living in humid country worsen it. i wish i lived in japan or other countries where i could wear this style freely..
i used to wear bulk cheap china false eyelashes but im in love with diamond lash recently because its really light on eyes, and quite affordable. you can purchase it from gallover.com ^^
if you have time and have chance to wear it everyday, good for you! I'd love to do this on daily basis as well but my safety is much more important lol Indonesia's crime rate is pretty high and its not impossible to be the victim if youre eye catching haha..
good luck <3
First of all who has over one hour to do make up every morning :D In this time in the morning I usually do make up, hair, get dressed and I eat breakfast :D
ReplyDeleteAnd I think it would look a bit strange if sb would wear false lashes even to school or work.. It's rather party look. But maybe in Asia is different, dunno ;)
well, i believe in some countries or cities , doing that kind of style for daily basis is acceptable. unfortunately it's different in my country :(
ReplyDeleteas for in asia, i think it's worse than in europe or states because usually blonde people are common. in here, the chance of people dye their hair to blonde is 1 : 20.000, probably :B
in tokyo is different because it's the main fashion city in asia. HK is also nice ;)
what make up do you wear on daily basis? ^^
i usually only put sunblock and lipbalm lol
You're so beautiful :) Thanks for sharing ^^
ReplyDeletethanks a lot :D youre pretty too :-*
ReplyDeleteThanks for your comment on my blog :-)
ReplyDeleteReally love this make-up tutorial, so inspiring..
I hope could try Gyaru style like you sometimes, because it's gorgeous :beauty:
thanks a lot for your kind comment <3 why dont you try it as well!! :D it's really simple and easy to achieve if you follow it carefully ^__^
ReplyDeleteOk :-)) I will hehe thanks again ;-)
ReplyDeletehi there, love ur tutorial.... I think the eyes were done really well, with the top eyelashes extension and also eyeshadow, double eyelid sticker! . but the only thing i think is that the lower lashes should be a bit closer (not so far from the bottom lash line)...but u are very cute :)
ReplyDeleteThank you for the compliment and suggestion Luisa!
ReplyDeleteHI, love ur tutorial, but i want ask u some questions:
ReplyDelete1. can i use white matte eyeshadow for highlight nose or i must use very light creme eyeshadow??
2. How much did u buy Pac creamy foundation?
Thank you :D
Hello! Thanks for liking it
ReplyDelete1. It doesnt matter whether you want to use pressed or creme eyeshadow, but I recommend using matte one so it would look more natural
2. I think its about 11-12USD :-D
REALLY PRETTTTTY, but i think you had ur bottom lashes placed on the wrong side.....STILL LOOK GOOOD THOUGH
ReplyDeletehahaha thank you for the suggestion, will improve
ReplyDeletehwuaa... so adorable.. you look like a dolls stella. :-)
ReplyDeletetp klo make up yg dipake ny buatan lokal (indo punya) bisa ga ya? maklum kantong mahasiwa,, itu merk blm kjangkau klo di beli semua,,heu
kenapa gak? kan yang penting teknik pengaplikasiannya
ReplyDeleteStella, you're sooo cuteee :-D Mau tanya dong itu rambutnya styling pake curling iron atau kamu perm ya? bisa bikinin tutorialnya nggaaaa? envy your hair tooooooo T_T
ReplyDeletethank you :D
ReplyDeleteitu pake curling iron :D ada tutnya di youtubeku www.youtube.com/stellalee92
i just changed my hair color loh! see the newest post ^3^